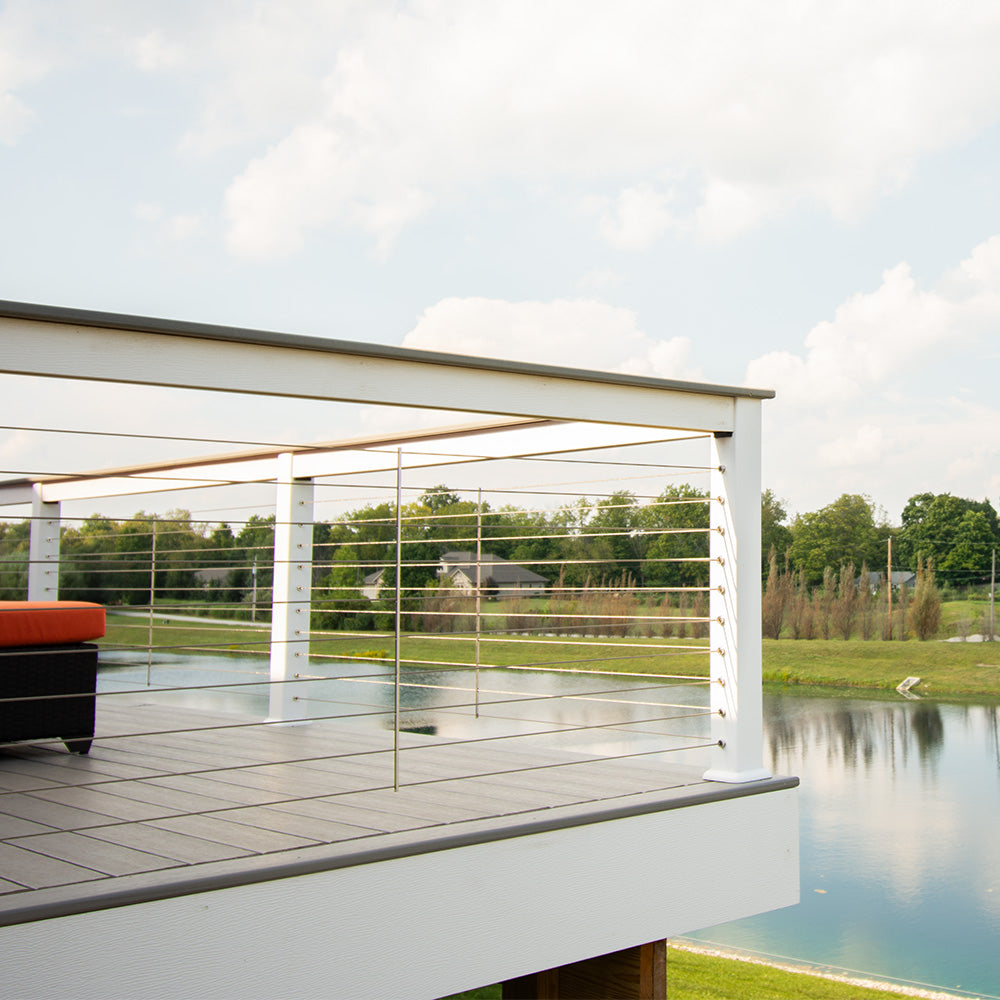
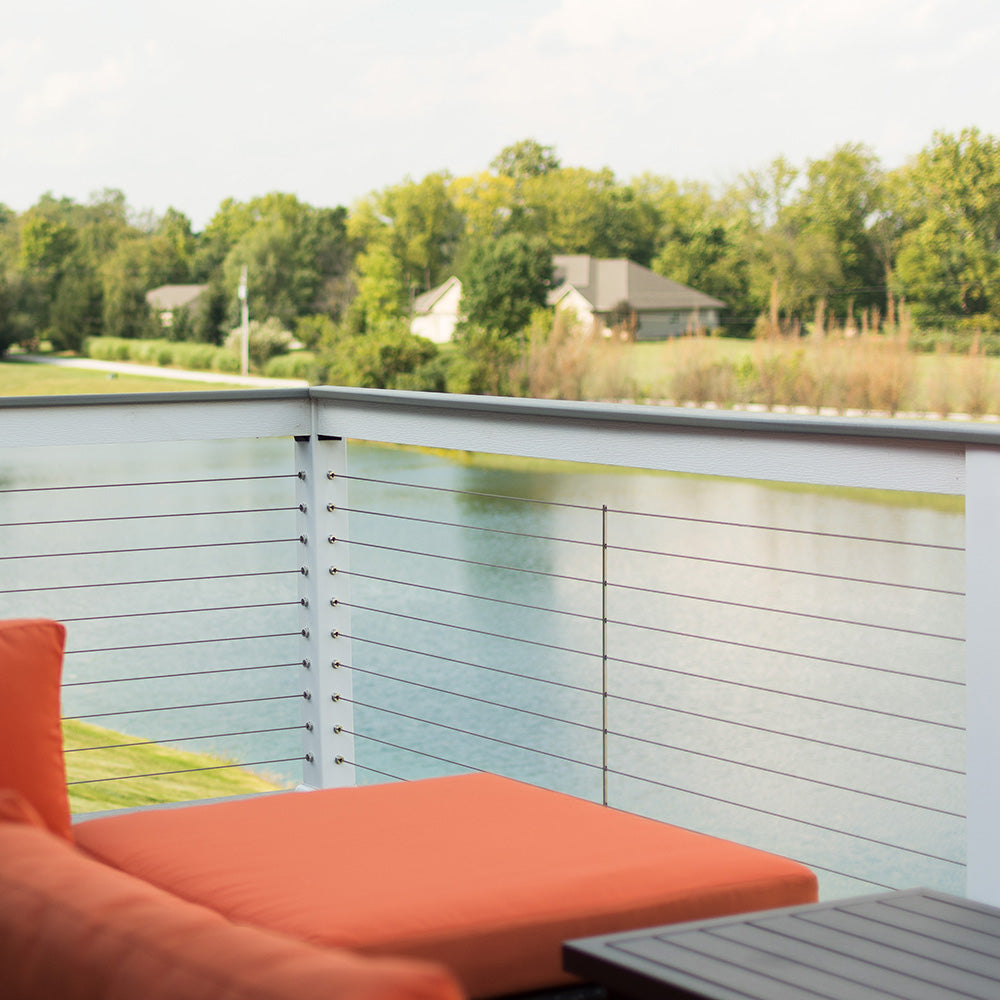
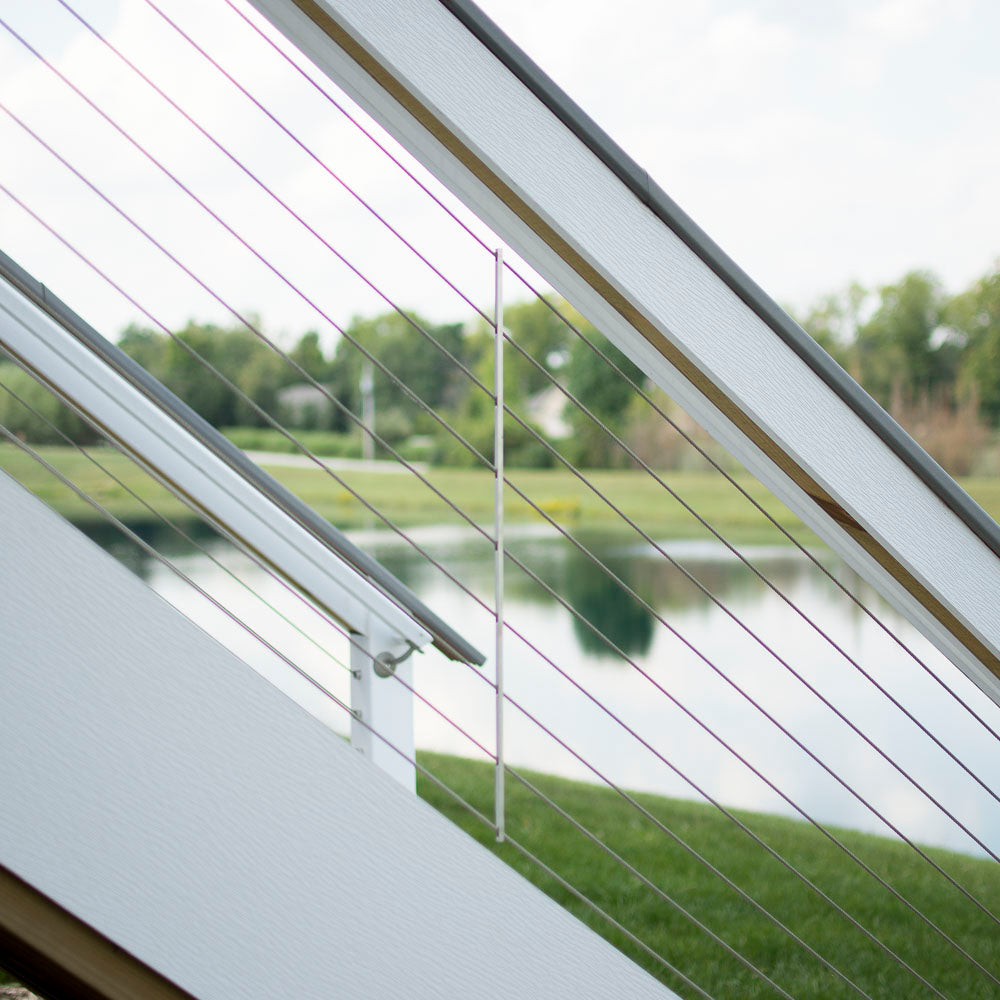
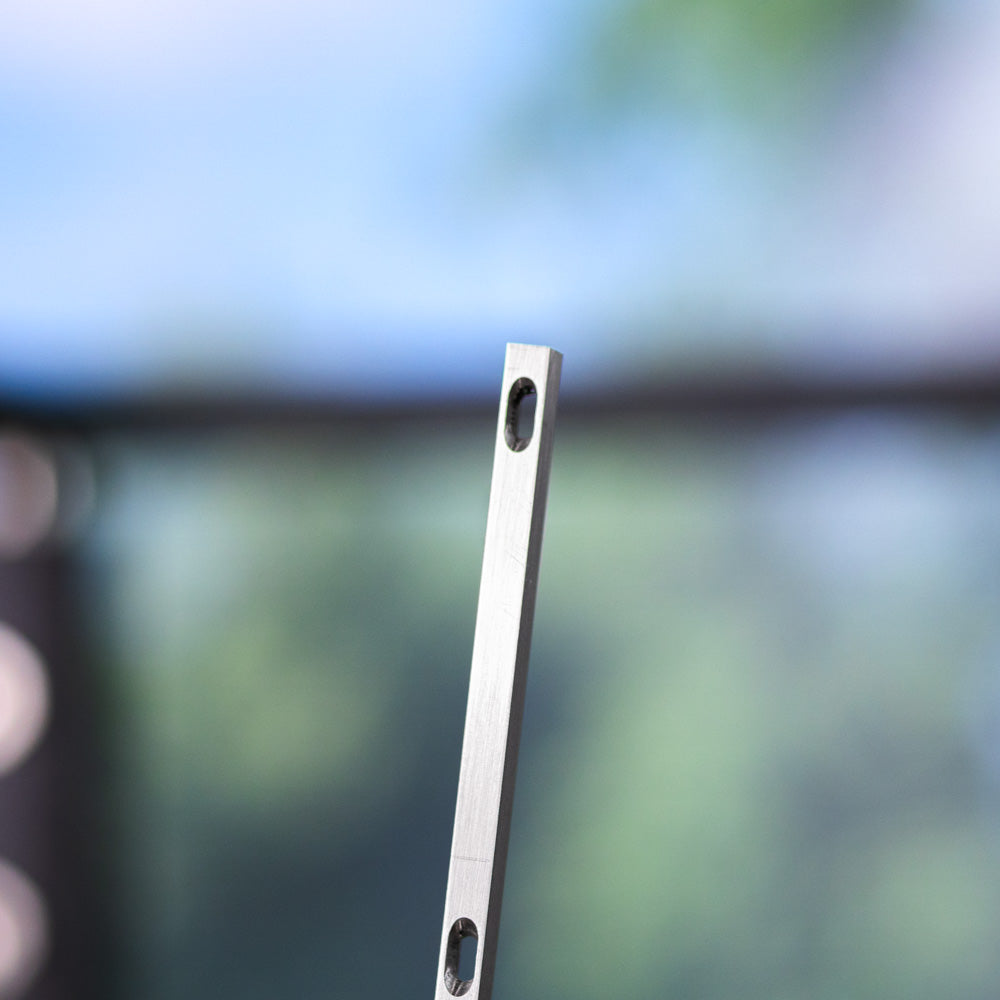
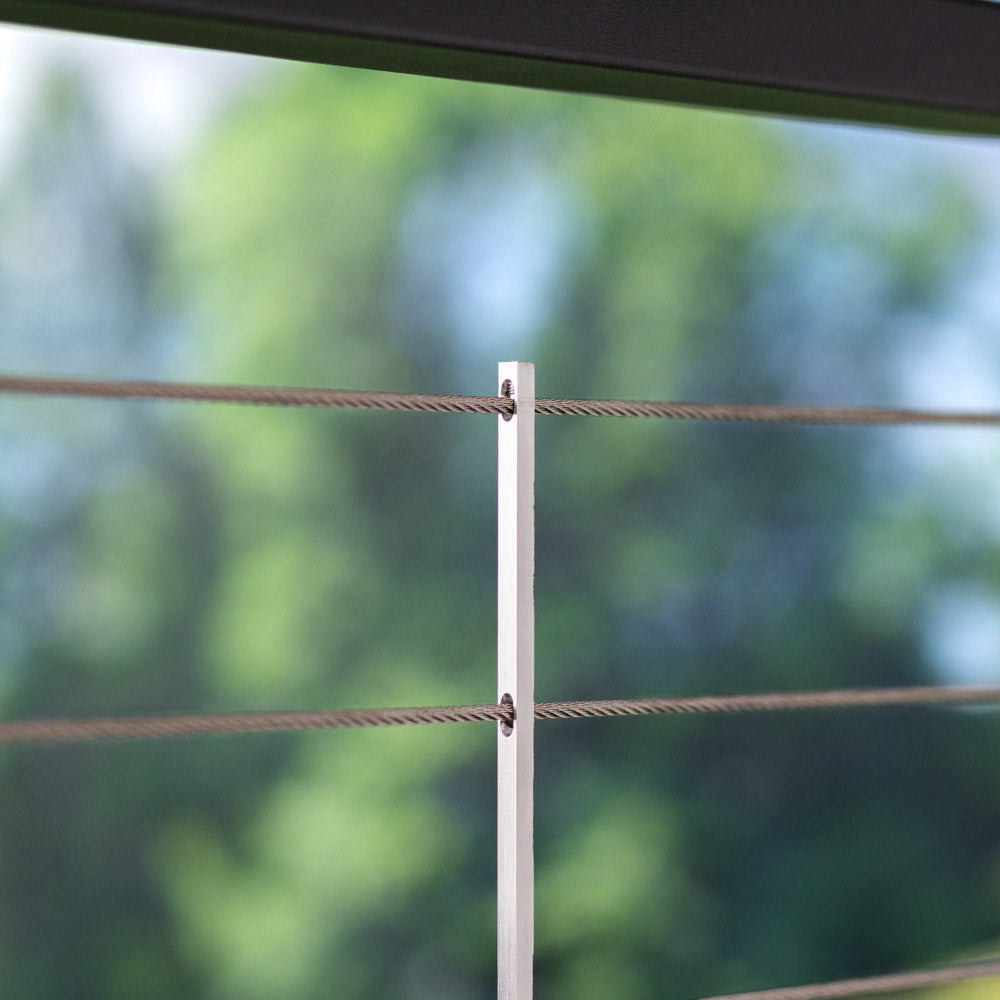
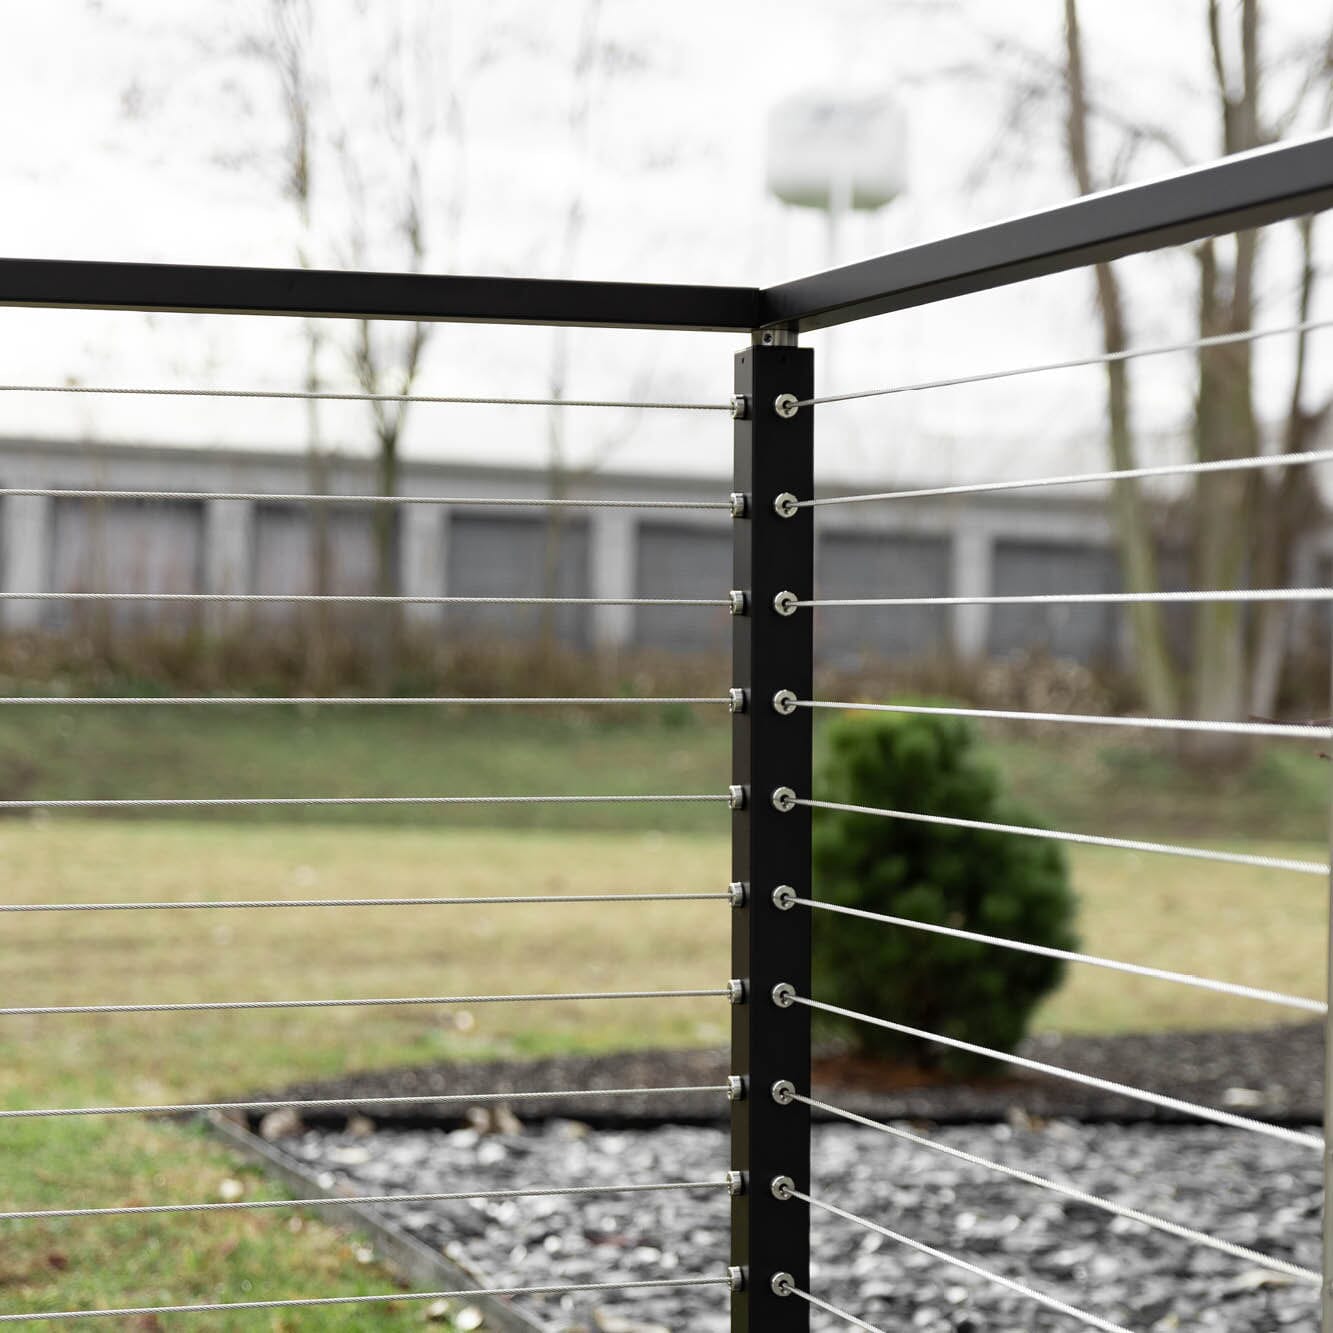
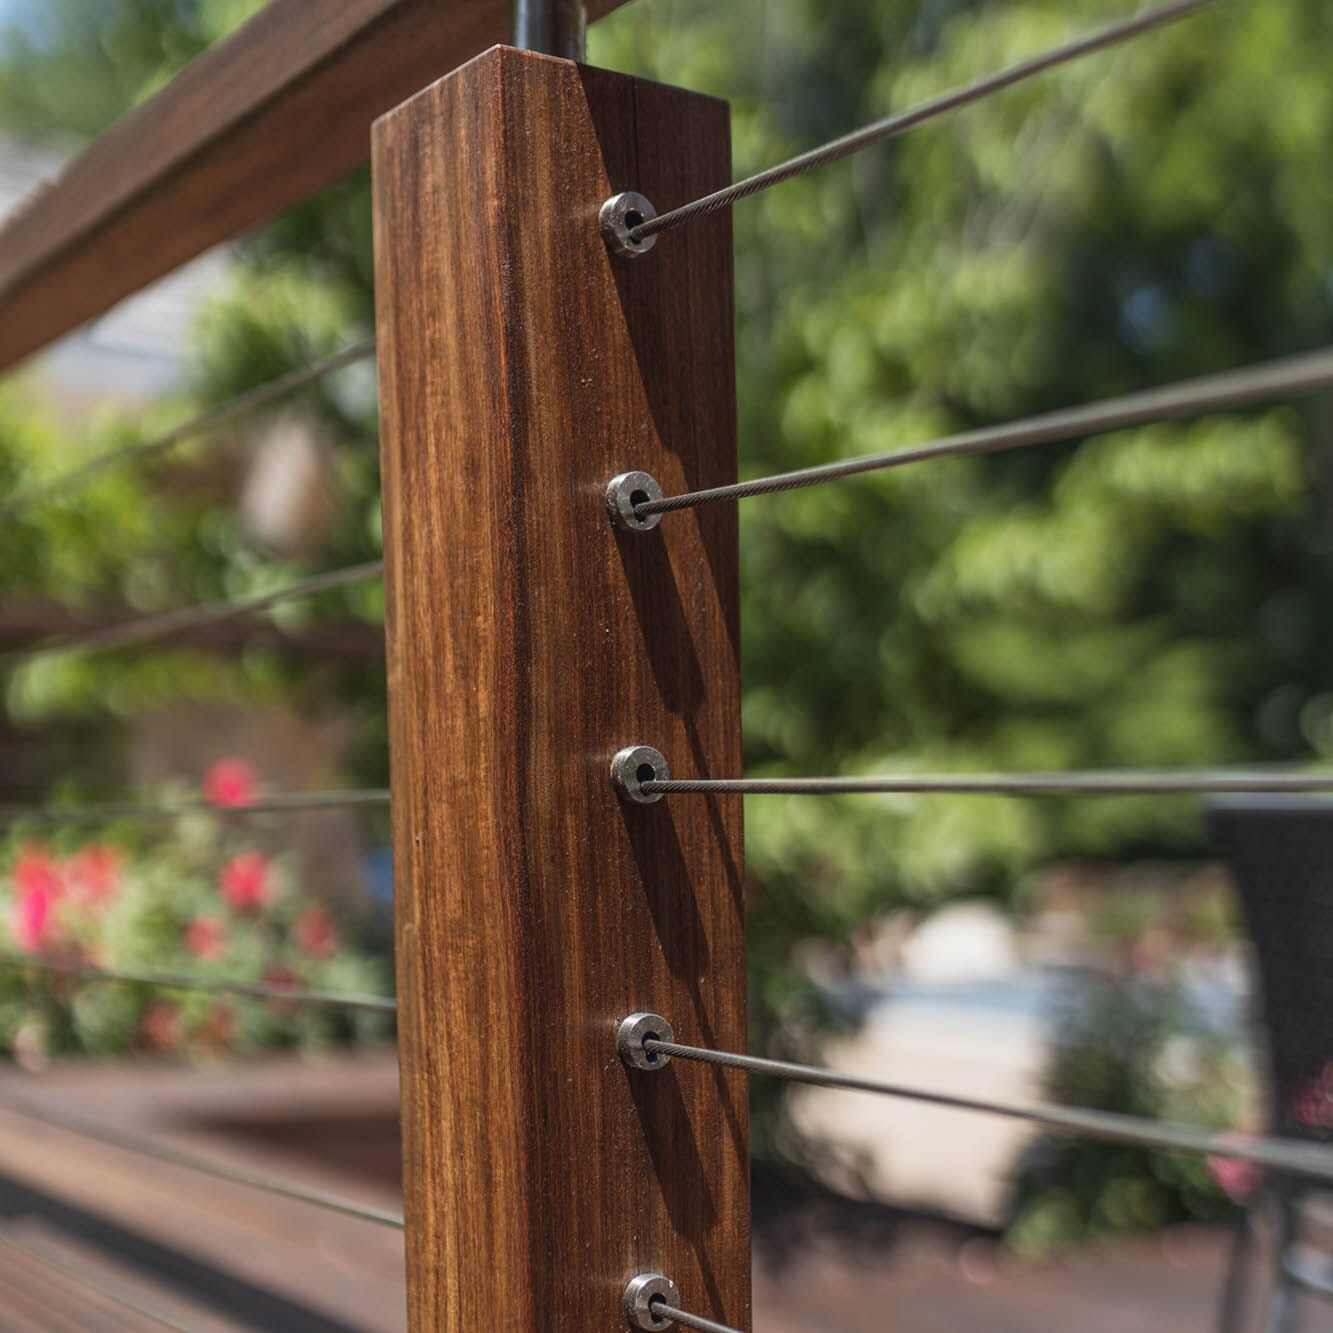
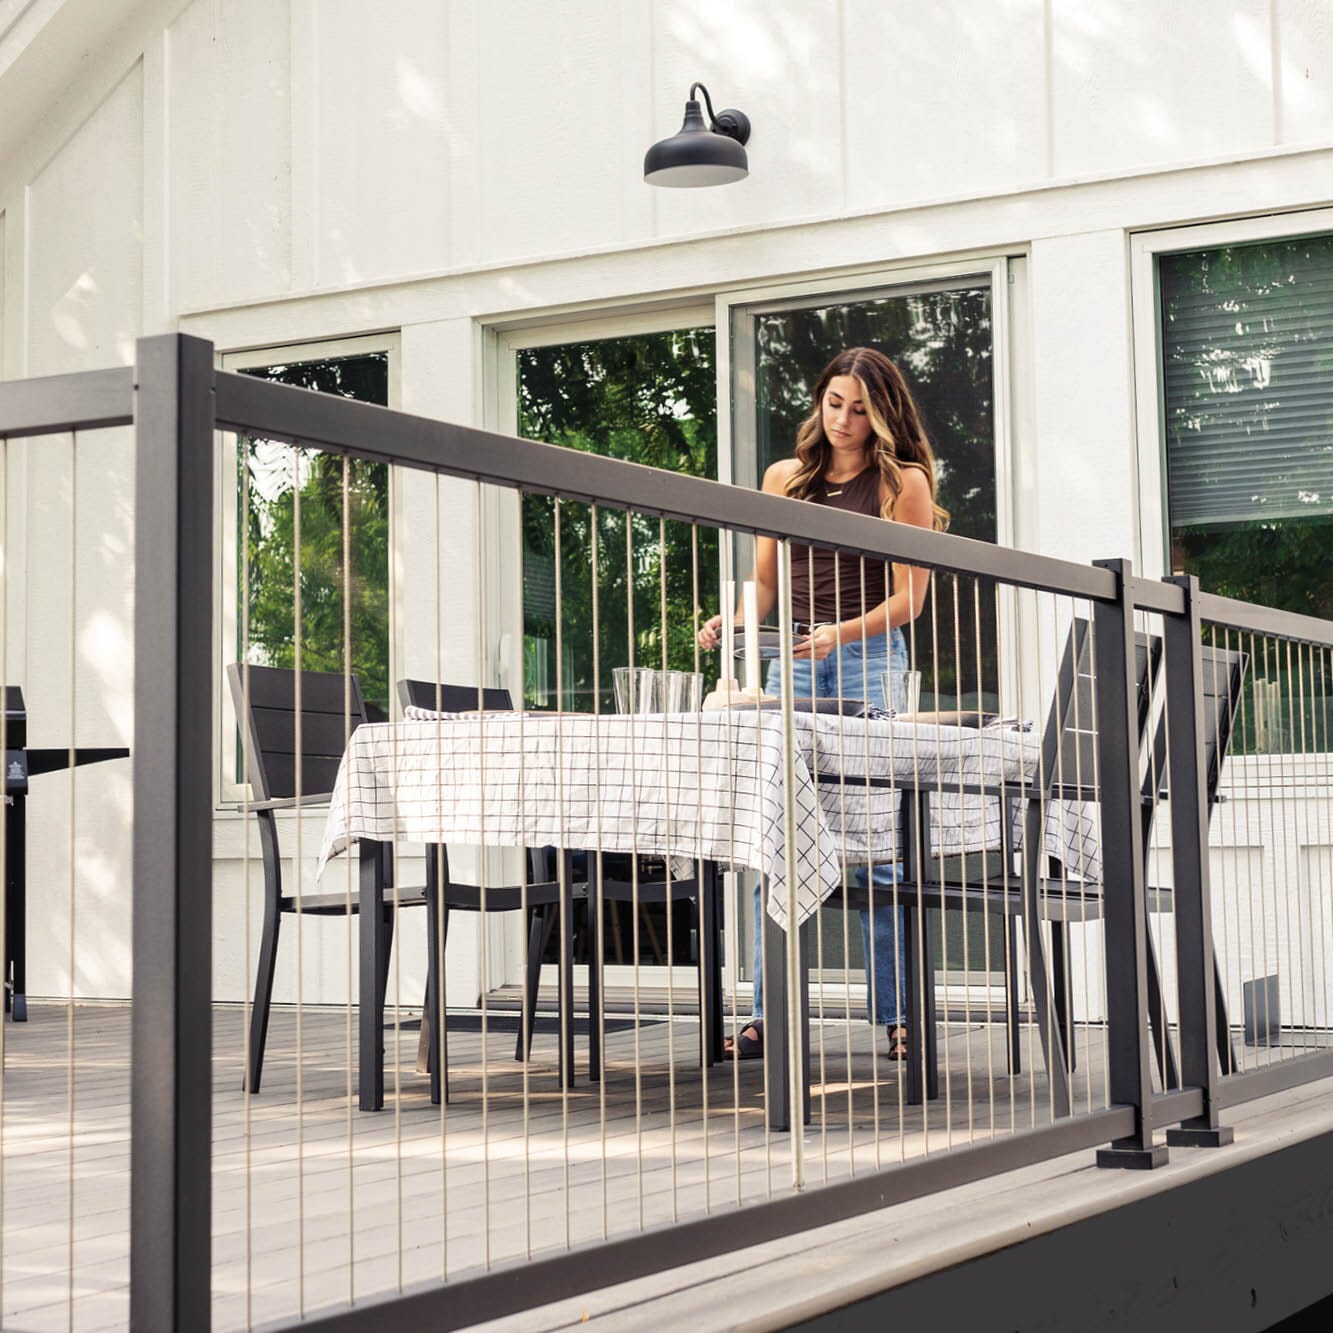
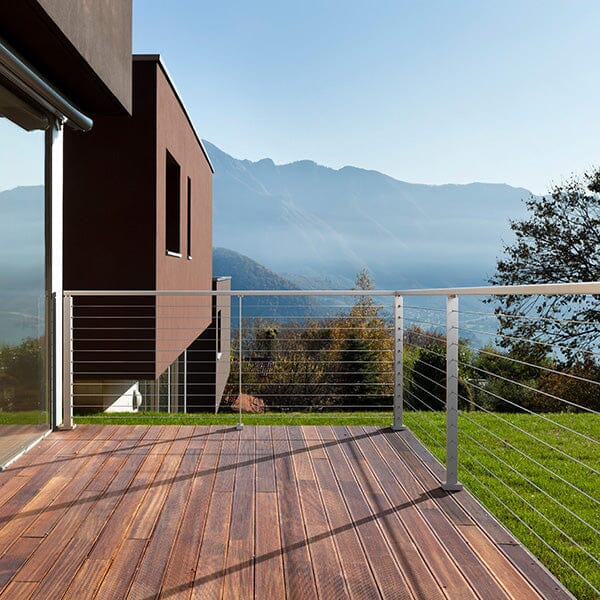
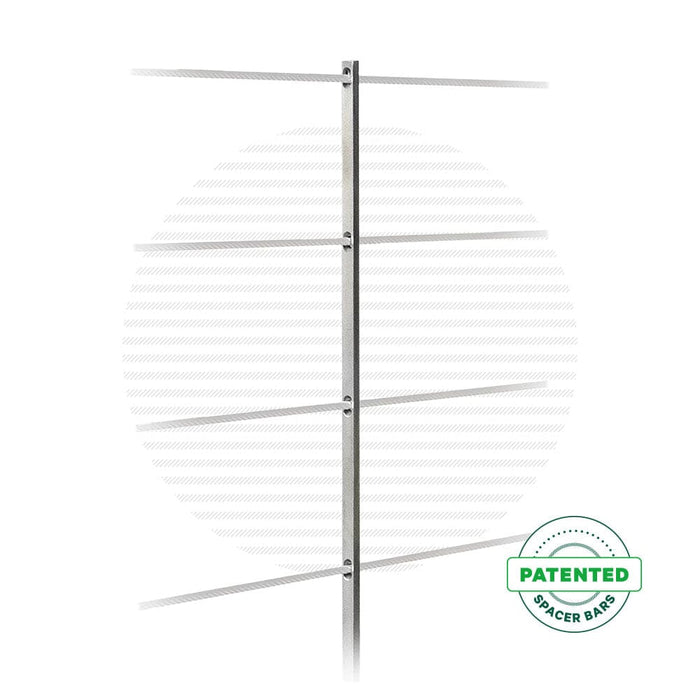
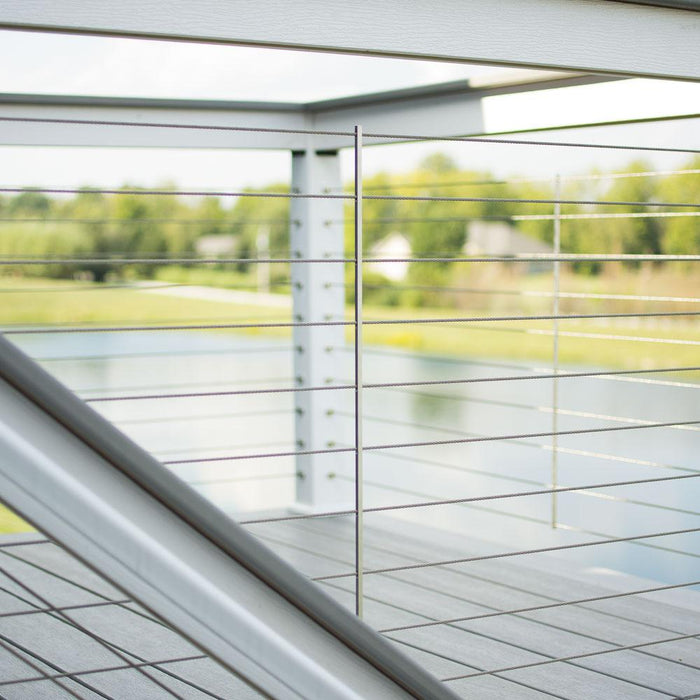
We're here to help.

574-742-2737

Search

Search

Use with soft or hardwood posts

SHOP >

Use with vinyl or composite post sleeves

SHOP >

Use with Signature series or custom metal posts

SHOP >

Use with structural masonry posts or columns

SHOP >

Aluminum posts, matching handrail, and stainless steel cable railing.

Shop >

Vertical cable railing with aluminum posts and rail.

Shop >

All stainless integrated post and tensioning cable railing.

Shop >

How to install cable rail kits in wood, metal, or masonry posts.

Browse Guides >

How to install Signature series posts, handrail, and cable infill.

Browse Guides >

How to install Venture series posts, handrail, and cable infill.

Browse Guides >

This section doesn’t currently include any content. Add content to this section using the sidebar.

Image caption appears here

Add your deal, information or promotional text

This section doesn’t currently include any content. Add content to this section using the sidebar.

Image caption appears here

Add your deal, information or promotional text

Free Shipping Over $1,999* | Details >

Cable Spacer Bar Kit

CSBK348-16

In Stock - Ships in 1–3 business days.

Free shipping on orders over $1,999* Full Details >

Longer Runs, Fewer Posts to Block Your View

Extend the length of your runs between structural support posts and clean up your view by adding Cable Bullet patented cable spacer bars to your railing. Adding spacer bars will significantly cut down on cable deflection, and allow you to space your bulkier and more expensive support posts further apart!

Continue Reading >

  • Cable Support that won't block your view

    Cable Bullet spacer bars are a modern, slimmed-down alternative to larger intermediate cable support posts or pickets. While they offer no load-bearing structural support, they are designed to minimize cable deflection by maintaining cable spacing to adjacent cables. Their sleek 1/4-inch profile, stainless steel construction, and patent-pending design allow them to blend in nicely with your cables while maintaining a clean, open view.

    Spacer bars are pre-drilled every 3 inches and are available in 8 to 13-hole configurations, each featuring two attachment options; floating or fixed. Open up your view and minimize cable deflection by installing spacer bars anywhere your cable runs span more than 4 ft between support posts. Designed for use with 5/32" diameter cable.

    Floating vs. Fixed

    Our most popular configuration is the floating spacer bar, which is attached to the top and bottom cable only, using two set screws. The floating spacer bar is ideal for post spans of up to 7'. A single floating spacer bar may be used up to 8', however, it's effectiveness at controlling cable deflection will begin to lessen.

    For longer spans, and anywhere you plan to use multiple spacer bars in a row, use the fixed spacer bar option. The fixed spacer bar includes a standoff in place of the top set screw to attach the spacer bar to the underside of your top rail. The standoff further supports the cable by drawing on the top rail for stability. Fixed spacer bars are not intended to provide structural support for your top rail.

  • Installation

    Installing Floating Spacer Bars

    Installing your floating Cable Bullet spacer bars is a simple, straight-forward process. Because they attach to the cables only, and not your deck or top rail, they require no advanced preparation. However, all spacer bars must be installed with your tensioners before your cable runs have been completed. They cannot be added to a railing after the project has been completed.

    1. Follow the instructions for setting your Cable Bullet tensioners in your end posts.
    2. Before crimping the second end of each cable, thread your cable through each intermediate post and spacer bar in your run. A crimped cable end will not fit through the pre-drilled holes in a spacer bar.
    3. When measuring to cut for the second end of your cable run, place the spacer bar as close to a structural post as possible. This will allow you to pull the cable tight and minimize cable deflection that would otherwise result in inaccurate measurements and slack lines.
    4. After all your cables have been installed, adjust the spacer bar positioning as needed, and tighten the set screws top and bottom to lock them in place.

    Installing Fixed Spacer Bars

    Spacer bars can be fixed to the top or bottom of your railing, however, we recommend anchoring the stand-off to the top rail. In most cases, a railing will have more consistent spacing between the top rail and first run of cable, than from the floor to the first rail. This is especially true for stair railing, as the distance from the tread to the first cable will vary.

    Spacer bars must be installed before crimping the second end of your cables. A crimped cable end will not fit through the pre-drilled holes in a spacer bar.

    1. Follow the instructions for setting your Cable Bullet tensioners in your end posts.
    2. To begin installing your spacer bars, first measure and mark the location for each spacer bar along the underside of your top rail.
    3. Drill a pilot hole for the spacer bar standoff.
      In softwood, use a ⅛” bit size. Hardwoods may require a 5/32” bit size to ease installation.
      For aluminum or steel handrail, use a #25 drill bit, and tap for 10-24 NC.
    4. Carefully screw each stand-off into the pilot hole. Use a standard drill if necessary.
    5. Screw the spacer bar to the stand-off.
    6. Don’t assume your top rail runs level across the entire span of your run. Correct for inconsistencies by making sure all of the spacer bars are vertically aligned, so each cable is straight and not bowed, once installed. You can adjust each individual stand-off to make sure they are all aligned and level. Make sure you are happy with your configuration before you finish crimping the second end of your cable.
    7. Thread your cable through each spacer bar and any additional intermediate support posts before finalizing your cuts and setting your opposing cable ends.
    8. After all your cables have been tensioned, tighten the set screw on the opposing end of the stand-off to lock the spacer bar in place.
  • Spacer Bar Dimensions

    Size Width Depth Height (Floating)* Height (Fixed)** Infill***
    8-Hole 1/4” 1/4” 21-3/4” 24-3/8” 27"
    9-Hole 1/4” 1/4” 24-3/4” 27-3/8” 30"
    10-Hole 1/4” 1/4” 27-3/4” 30-3/8” 33"
    11-Hole 1/4” 1/4” 30-3/4” 33-3/8” 36"
    12-Hole 1/4” 1/4” 33-3/4” 36-3/8” 39"
    13-Hole 1/4” 1/4” 36-3/4” 39-3/8” 42"

    *Overall height of the spacer bar only.

    **Height of the spacer bar with the standoff. This measurement does not include the two threaded ends of the standoff that attach to the spacer bar and top rail.

    ***To determine your infill, measure the height from the floor (or bottom rail) to the underside of your top rail.
    The maximum infill height recommendation is based on the 3-inch spacing between cable runs to allow for cable deflection and accommodate stricter interpretations of the International Residential Code (IRC).