How to Clean & Maintain Stainless Steel Cable Railing
Stainless steel cable railings are a popular choice for their sleek appearance and durable properties, offering both functionality and style to any decking or staircase project. Whether you've chosen this type of railing for its modern look or corrosion-resistant qualities, maintaining its condition is key to ensuring it lasts for years to come.
In this guide, we'll walk you through the essential steps to clean and maintain your stainless steel cable railing effectively. By following these simple practices, you can protect your investment from environmental elements and everyday wear and tear.
How difficult is this project?
This project is: DIY-FRIENDLY

Type 316 marine-grade stainless steel has a great reputation and solid track record for holding up well, even under harsh conditions.
However, nothing lasts forever, and even the most corrosion-resistant materials will rust if not properly treated and maintained. To ensure your stainless steel cable railing remains pristine and functional for years, follow the steps outlined below.

Materials You'll Need
Here's what you'll need to complete this project:
- Nylon brush
- Soap and water
- Blow dryer (optional)
- Boeshield Rust Free (for treating existing corrosion)
- Boeshield T9 Stainless Steel Protectant
- Shop rags
Download our PDF guides
Cable Bullet Care & Maintenance Instructions
Step 1: Clean Your Stainless Steel Railing
Immediately after installation, clean the seams, post bases, and any areas where stainless steel may have been scuffed. Use a soft nylon brush to remove dirt and wash your railing with warm water and mild dish soap. Ensure to dry all components thoroughly with a soft cloth or blow dryer.
What If My Existing Railing or Hardware Is Showing Signs of Rust?
It is essential to clean away all surface-level rust before treating your hardware. If your stainless steel hardware is showing signs of rust, corrosion, or patina, we recommend using Boeshield Rust Free as a first step. Follow the manufacturer's instructions for applying and using Rust Free safely. It is essential to clean away all surface-level rust before treating your hardware.
- For light rust: apply the solution to a soft cloth and wipe off rusty and spotted areas.
- For heavy rust: spray directly on the rusted surface and scrub with a mildly abrasive pad. Wipe off and repeat as necessary.
WARNING: Avoid using all-purpose cleaners, chlorine bleach, and abrasive cleaners which can cause damage.
Step 2: Protect Your Aluminum or Stainless Steel Components
Apply Boeshield T-9 Rust & Corrosion Protection Waterproof Lubricant or your preferred stainless steel cleaner to all stainless steel components of your cable railing to prevent rust and corrosion. Ensure to treat the tensioner set screw channel to keep it from gumming up, maintaining smooth tension adjustments over time.

How Should I Treat Stainless Steel Hardware in Metal Posts?
The T-9 aerosol spray is ideal for direct application on a metal railing. For a light protective coat, wipe off excess. If your railing includes wood components, apply the lubricant to a soft cloth or sponge first to prevent wood contact.
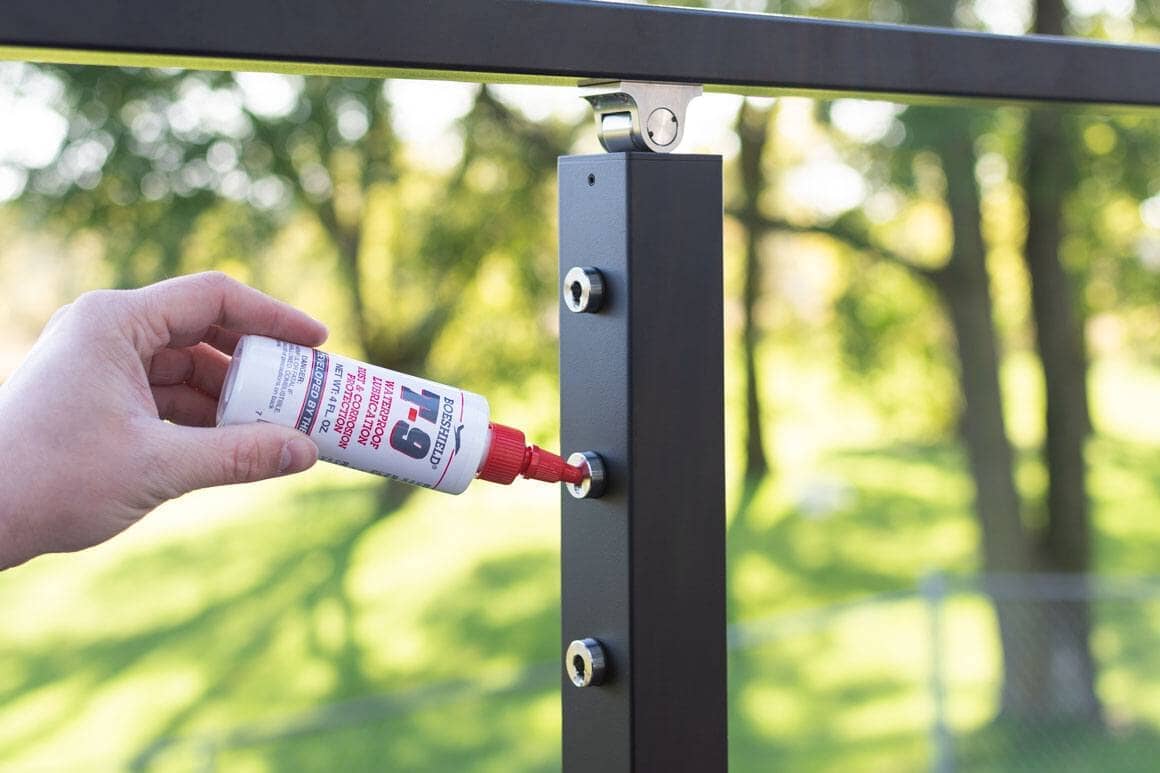
How Should I Treat Stainless Steel Hardware in Wood Posts?
The T-9 squeeze bottle is ideal for the wood post railing due to its precision application. Squeeze lubricant onto a soft cloth or sponge and apply to all exposed stainless steel components.
WARNING: Avoid exposing any wood to the lubricant, as it may cause discoloration.
Step 3: Repeat the Process as Often as Necessary
Regularly maintain your cable railing by treating all components at least annually, or more often depending on your environment. The frequency of cleaning and protection will largely depend on your hardware's exposure to the elements.
Inland vs. Coastal Environments
If you live within one mile of environments that expose your cable railing to acid rain or salt air and spray, treat your railing at least every 3-6 months, or as needed. Regular inspections will help you understand how your unique environment impacts your railing. The best time to treat your railing is at the first sign of corrosion. Failing to adequately clean and protect your stainless steel can result in rust, compromise the integrity of your railing, and present a safety concern.
For less exposed or indoor installations, inspect your railing at the end of each season to prevent any issues.

Maintaining Cable Tension Over Time
Re-tensioning your cables post-installation is a common requirement and should be considered a normal part of maintaining your cable railing system. This is particularly necessary when cable railings are installed on new structures, as the foundation may settle or shift over time. Factors such as metal expansion, contraction, and stress on the cables can also lead to the need for adjustments to ensure that your railing remains secure and aesthetically pleasing.
Routine Checks for Optimal Performance
Ensure to check the following one month after installation and no less than once yearly thereafter:
- Inspect cable tension: If you notice any cables beginning to sag, tighten them using a 3/32” Allen wrench to adjust the set screw at either end.
- Clean set screw channels: Regularly check each set screw channel for buildup. If you encounter resistance or buildup when adjusting the set screw, clean and lubricate the channel to ensure smooth operation.
- Examine posts for wear: Especially in harsh environments, it's crucial to check your posts for signs of decay. Wood rot and rust can compromise the stability and safety of your railing.
Watch this short demo video for tips & tricks when re-tensioning your cables. Use either a 3/32" Allen wrench or a 3/32" hex socket head power bit.
Maintaining your stainless steel cable railings is key to ensuring their longevity and aesthetic appeal. Regular cleaning, proper re-tensioning, and vigilant checks for wear are essential to keep your railings in top condition. By following the guidelines provided in this guide, you can protect your investment and enjoy beautiful, sturdy railings for years to come. Remember, the effort you put into maintenance today will save you from costly repairs and replacements in the future. For more detailed information on specific products or additional guidance, don’t hesitate to reach out to Cable Bullet’s customer service team.