DIY Cable Railing Installation with Wood Posts
Is Installing Cable Railing with Wood Posts a DIY-Friendly Project?
This project is: DIY-FRIENDLY
Installing cable railing through wood posts is an accessible project for most DIY enthusiasts, especially with Cable Bullet’s Wood Post Tensioner Kits designed for ease and versatility.
Whether working with softwoods like cedar, redwood, and pine or tackling dense hardwoods such as oak, maple, or Ipe, this project can be managed with a few tools and some patience. For hardwood posts, tapping pilot holes after drilling ensures a secure and professional finish.
Cable Bullet tensioners, made from 316 marine-grade stainless steel, provide a sleek, corrosion-resistant solution that works beautifully in both interior and exterior settings. Whether upgrading a deck or opening up interior views, these tensioners offer durability and style, making the installation process rewarding and the results stunning.
Continue reading or download the full installation instructions:
Materials List for Installing Cable Railing through Wood Posts
Supplies:
- Tensioner kits
- 5/32" diameter cable
- Boeshield T-9® stainless steel lubricant
- Post hole covers (optional)
- Deluxe post hole covers (optional)
- Cable spacer bar kits (optional)
- Shop rags
Tools:
- Drill (1/2” chuck) and drill bits 9/16” & 3/16”
- Tape measure & combination square
- Cable Bullet installation kit for wood posts
- Socket screw driver
- Socket wrench with 7/16” head (optional)
- Drill guide (optional)
- Cable Bullet hardwood tap (optional)
- T-10 Star drive (optional)
Step-by-Step Guide to Installing Cable Railings in Wood Posts
1 | Project Guidelines
- Cable tensioning posts can be spaced up to 20 feet apart. To maintain optimal tension, add tensioners for longer runs.
- Add Cable Spacer Bars or cable support posts every 42 inches to minimize cable deflection under load.
- Space your cables every 3 inches apart to allow for some cable deflection while maintaining a 4-inch gap between cable runs.
- Support your top rail as needed with structural posts. Consult your builder for post spacing and top rail design on your project.
PLEASE NOTE: All Cable Bullet recommendations and rail components are designed to comply with the International Residential Code (IRC). However, because building codes may vary it is the installer's responsibility to verify that the installed system complies with all applicable state and local building codes. For more information on Cable Bullet and building code standards, visit our terms page.
2 | Measuring & Marking Posts

End Posts
Measure and mark the location for each of your Cable Bullet tensioners.
Intermediate Posts
Do the same for all your intermediate cable pass-through holes.
PRO TIP: Consider your cable placement relative to any stair run to avoid off-set cables.
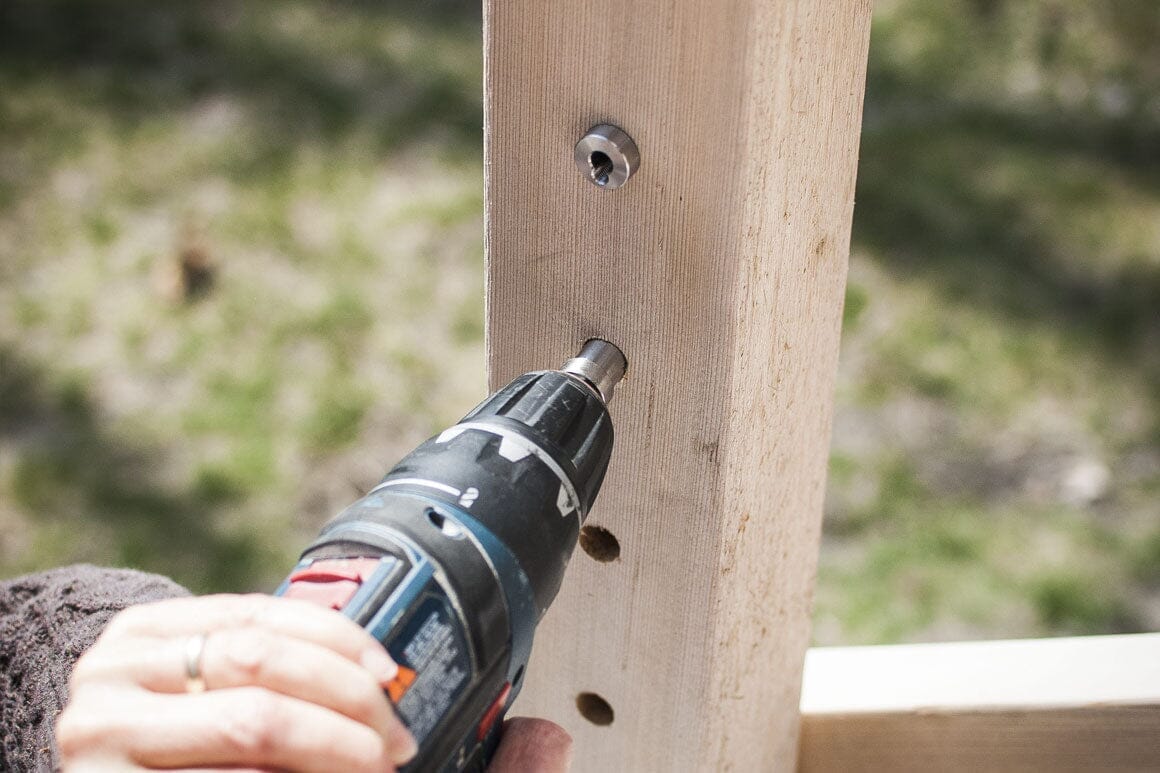
3 | Drilling & Tapping Holes

Tensioner Holes
For each Bullet use a 9/16” bit to drill a level hole to 1-1/2” depth (2” for XL, 2-3/4” for XXL).
In hardwood posts ONLY, use the hardwood tap to ease installation.
Post Wraps & Veneers
Drill a 5/8” hole through any post wrap or veneer to ease installation (XL & XXL ONLY).
4 | Intermediate Posts

Pass-Through Holes
Use a high-quality 3/16” carbide bit to drill your cable pass-through holes. Thicker posts and columns will need to be drilled from two sides to maintain a level hole.
Use the Cable Bullet drill guide (optional) to assist in drilling your tensioner and pass-through holes.
PRO TIP: Clamp a piece of wood to the back side of your post to avoid blowout.
5 | Installing Tensioners

Use a drill with a 1/2” chuck and the Bullet driver to screw each Bullet into the posts.
Optional: Use a socket wrench and 7/16” head to align tensioners so the set screw is accessible relative to the angle of the cable.
WARNING: Do not use an impact driver, or you can damage the set screw channel, increasing the likelihood of seizing or stripping during installation.
6 | Post Hole Covers (Optional)

Each post-hole cover is secured to the post with one #4-24 x 5/8” screw using a T-10 x 2” Star Drive Power Bit.
For hardwood posts drill a 3/32” pilot hole.
PRO TIP: Use a scrap piece of cable to "hang" your post hole cover in place while fastening it to the post.
7 | Adding Deluxe Post Hole Covers (Optional)

Drill a 9/16” hole to 1/2” depth, centered on your 3/16” pass-through hole. Use the Bullet Driver and a drill or socket wrench to set the Deluxe Post Hole Cover.
PRO TIP: Use deluxe post hole covers on transitional posts that break a straight run, e.g. at the top of stairs, two-post corners, and 45-degree turns to save on tensioners and protect your post from abrasion and the resulting compression load.
8 | Positioning Spacer Bars (Optional)
![]()
Spacer Bar Standoff
Spacer bars can be attached to the top rail using a standoff. Drill a 1/8” pilot hole and use a drill to set the standoff, then thread the spacer bar onto the standoff.
PRO TIP: Protect the finish and threads on your standoff during installation with a piece of painter's tape.
9 | Cutting Rough Cable Lengths

Measure your runs and cut over-sized, rough lengths of cable for each.
NOTE: Be sure to leave an extra few inches so as not to end up short. You will make a finish cut later.
10 | Lubricating Tensioners

Apply a drop of Boeshield T-9 lubricant to the set screw channel of each tensioner to ease installation and reduce the likelihood of seizing, passivate the stainless, and help prevent corrosion.
WARNING: To avoid staining, take special care to avoid spilling T-9 on the surface of your wood surfaces.
11 | Crimping Cable Ends

Fit the first end of your cable with a Lobed Washer and Crimp Sleeve. Use the Cable Bullet Crimper to firmly set the crimp.
12 | Setting Cable Ends

Insert the crimped cable and lobed washer into the tensioner and use a 3/32” Allen key or hex socket power bit to advance the set screw until it is flush with the face of the Bullet.
CAUTION: To minimize the risk of cross-threading or galling, use a manual socket screw driver or Allen key.
13 | Running Cables

With the crimped end locked in place, thread your cable through all intermediate posts and Spacer Bars (where applicable).
PRO TIP: Tape your floating spacer bars to the closest post until all your cables are set.
14 | Cutting Exact Cable Lengths

Pull the cable hand-tight, measure an inch past the face of the tensioner, and make your finish cut.
Repeat steps 11 and 12 to secure the second end of your cable, then repeat the entire process for each of your remaining cables.
15 | Final Tensioning

Once all your cables are in place, begin tensioning each run from the innermost cable outwards.
How tight is tight enough?
A properly tensioned cable will deflect approximately 1/4” per foot under a 50lb load. A properly tensioned wire will feel more like a bass guitar string, less like piano wire.
16 | Setting Spacer Bars
![]()
Position and lock your floating cable spacer bars in place by advancing the set screw top and bottom.
Cable Railing Care & Maintenance Instructions
Once your cable railing installation is complete, proper care and maintenance are essential to preserve its sleek appearance and structural integrity.
Regular cleaning, tension checks, and protective treatments will keep it looking and performing its best. Follow Cable Bullet Care & Maintenance Instructions guidelines for lasting beauty and functionality.