
How to Install Cable Rail Tensioners in Masonry Columns
How difficult is this project?
This project is: DIY-FRIENDLY - INTERMEDIATE
Installing tensioners in masonry posts is a simple process that requires extra care when setting the epoxy anchors. Special bits for drilling may be required.
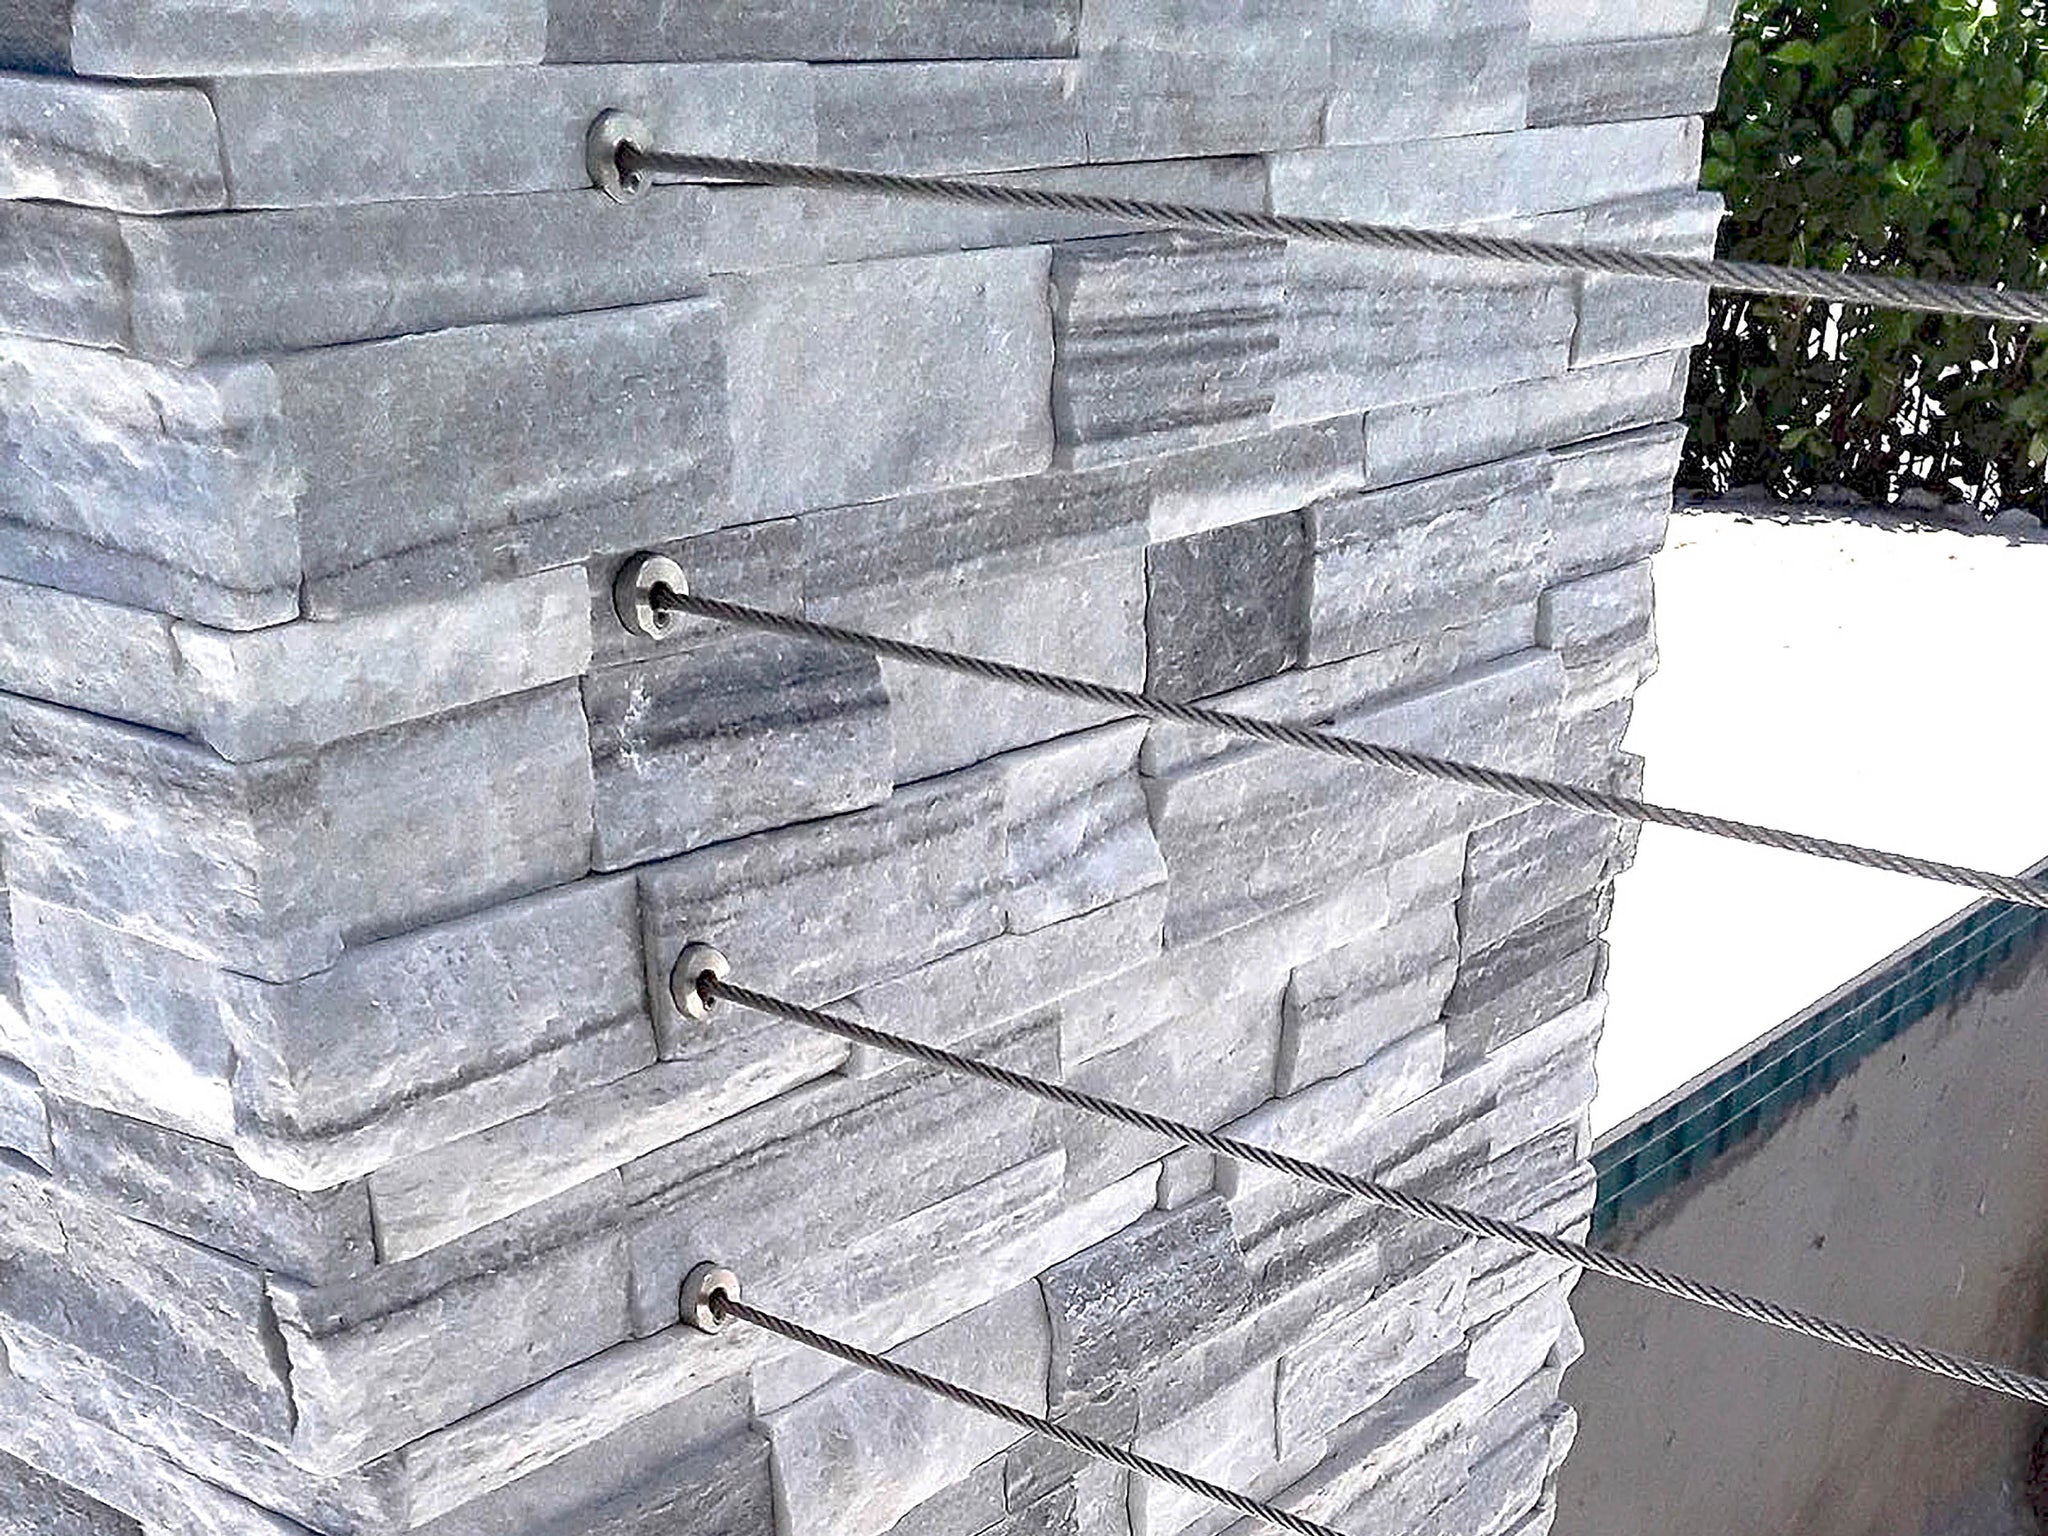
Turn any structural stone, brick, cinder block, or concrete wall or column into a cable rail tensioning post with cable rail kits for masonry posts. Each kit includes one epoxy anchor A (fitted with a capped D epoxy plug C) and one metal post tensioner B with all the fittings to set and tension a single cable end. Once set, the stainless steel epoxy anchor is designed to create a threaded connection point for the cable rail tensioner in any structural masonry wall or column.

Continue reading or download the full installation instructions:
Follow these instructions to set the epoxy anchor, then reference the steps for installing Cable Bullet metal post tensioners in the Signature Series Cable Railing installation instructions brochure.
How to Install Cable Tensioners PDF>
Materials List:
Supplies:
- Tensioner kits
- 5/32" diameter cable
- Structural masonry epoxy (with similar color to your masonry surface, if possible)
MUST be compatible with 200 pounds constant load and 800 pound impact load - Hole cleaning brush & compressed air
- Clean-up rag
Tools:
- 3/4" Masonry drill bit & drill
- Tape measure
- Cable Bullet installation kit for masonry posts
CAUTION: Cable railing produces significant tension loads. The masonry structure which the Cable Bullet system is applied to must be capable of supporting continuous loads of 200 pounds per anchoring point. In combination with multiple anchors, this tensioning load can be significant. It is the installer's responsibility to ensure adequate structural support.
Setting Epoxy Anchors
- Locate desired epoxy anchor locations to align with planned cable railing layout. Space your cables 3 inches apart to allow for some cable deflection under load.
- Drill a 3/4" diameter hole 2" deep for each epoxy anchor. Use a hole cleaning brush or compressed air to clear the holes of all dust and debris.
- Dry fit a Cable Bullet epoxy anchor to ensure proper depth and alignment with your cable run.
NOTE: The epoxy anchor will arrive fitted with a plastic plug C to prevent epoxy from entering the threaded space of the anchor. Do not insert the anchor into the epoxy without the plug. The cap D is used to hold and position the anchor during the installation process. Once the epoxy has cured, the cap may be removed to make room for the cable rail tensioner. - Mix and apply the epoxy per the manufacturer’s instructions (will vary by epoxy). Fill the hole approximately 50% with epoxy, or follow the manufacturer’s instructions.
- Set the epoxy anchor. The front metal edge of the anchor should be flush or slightly recessed from the masonry face.
WARNING: Epoxy can stain masonry! Carefully remove any excess epoxy as quickly as possible. - Allow the epoxy to cure per the manufacturer’s instructions. After the epoxy is fully cured, remove the plug. This should clear the entire threaded chamber.
NOTE: Check your anchor placement throughout the curing process! Anchors may shift out of position while the epoxy is still soft. - Thread the Cable Bullet tensioners into the epoxy anchors.
NOTE: If there is excess epoxy around the anchors after they have set, use a rotary tool with a small grinding bit to carefully clean up any spillage before inserting the tensioners.
Setting & Tensioning Cables
All Cable Bullet tensioners feature the same patented internal tensioning mechanism. Once you've set your epoxy anchors simply follow the basic instructions for installing metal post tensioners.
PLEASE NOTE: All Cable Bullet recommendations and rail components are designed to comply with the International Residential Code (IRC). However, because building codes may vary it is the installer's responsibility to verify that the installed system complies with all applicable state and local building codes.
For more information on Cable Bullet and building code standards, visit our terms page.
Care & Maintenance
After you’ve finished the installation process, follow the Cable Bullet Care & Maintenance Instructions to make sure your cable railing looks great for years to come!